Make your image stand out with a sky overlay.
Sometimes, you catch a beautiful image, but in order to expose the subject correctly, the surrounding area gets over exposed, which causes the sky to get blow out. One of the best ways to boost the "wow" factor of the images is to add a sky overlay. Below is the image I will be working with.
Step One: Open your image in Photoshop and find a sky overlay you would like to use. Make sure the light matches the image well. For this image, the light is very soft and slightly warm. If I did a sunset or a bright blue sky alone, it would look unnatural. Instead, I chose a blue sky with a little bit of sunlight in the corner. Make sure the source of the light on the overlay, if there is one, matches the direction of the light on the image.
Step Two: Once you have chosen your sky overlay, open it in Photoshop, and drag and drop it onto your original image. Select "Edit", and go down to "Free Transform" to resize the overlay to cover the blown out sky, as shown below.
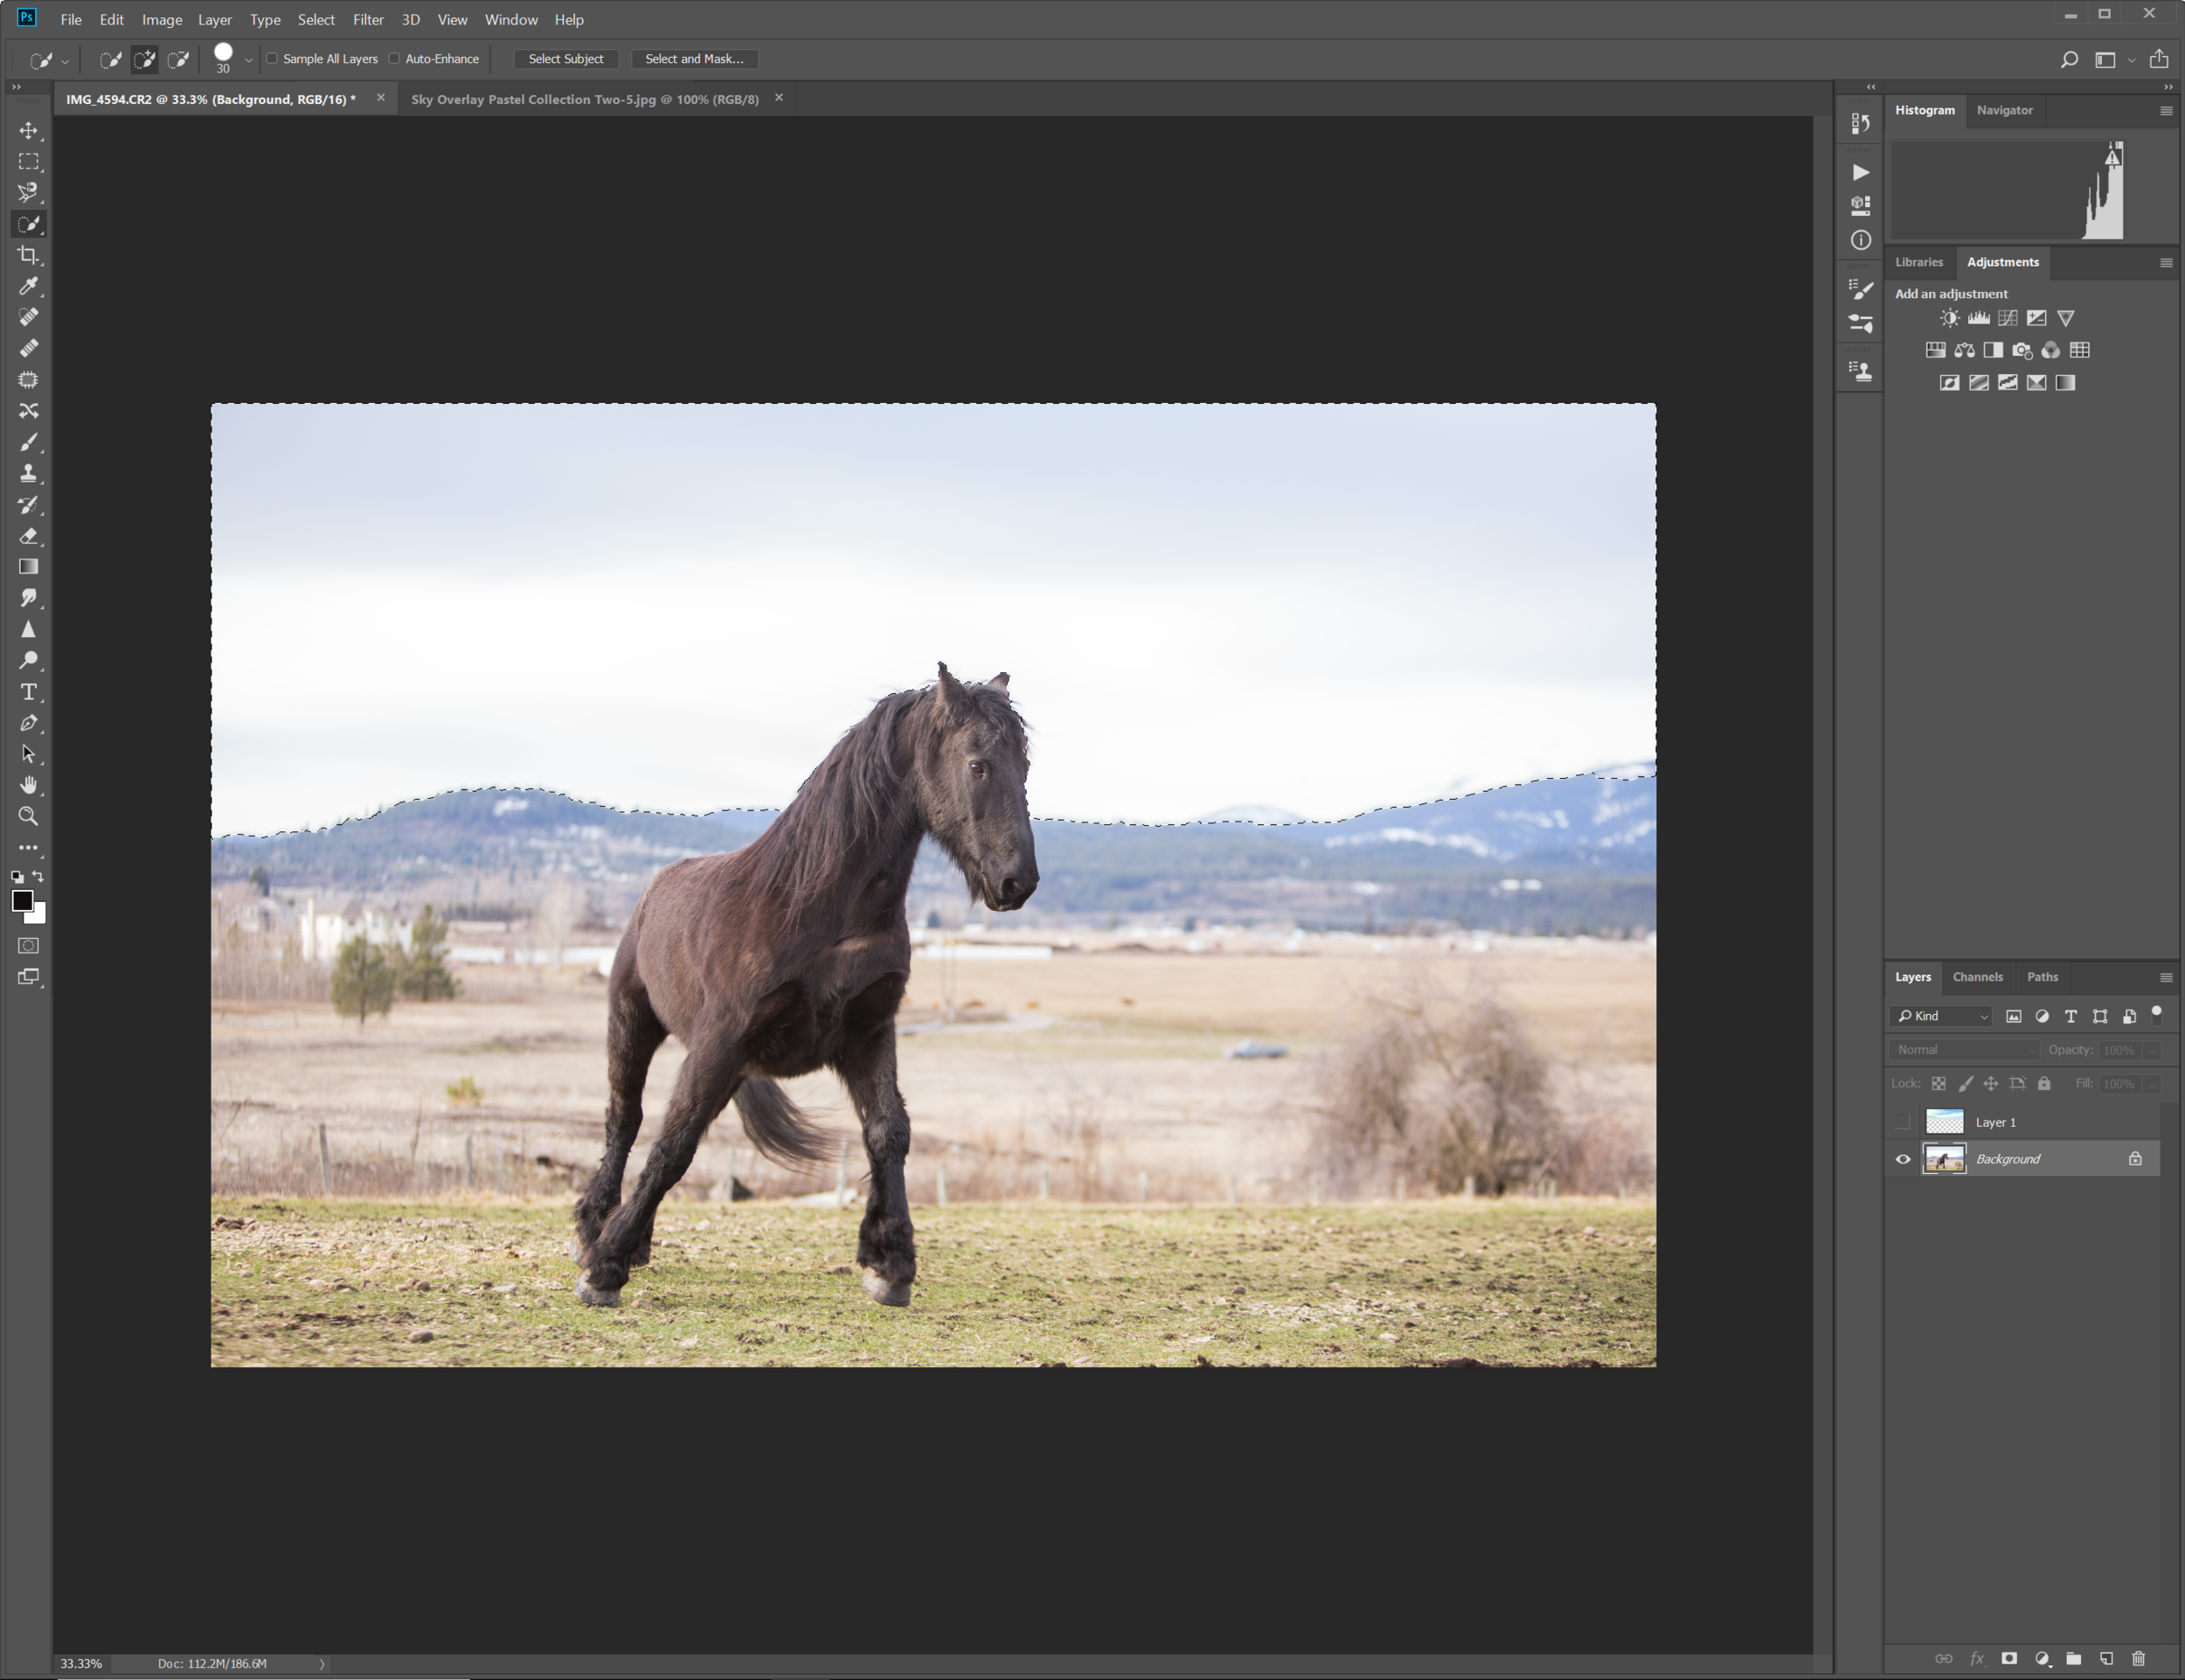
Step Three: Hide the sky overlay layer by clicking the eyeball symbol on the layers panel. Select the original image in the layers panel, and go to the "Quick Selection" tool. Hold your mouse down and drag slowly over the blown out sky until the entire sky is selected. Don't worry if the selection includes a little bit of extra content, you can take care of that later. Below, you can see my quick selection, and then again with the sky layer showing.
Step Four: Make the sky overlay layer visible again. You will see the dotted line of the selection on the sky layer, as seen below. Once that all looks good, select the sky overlay layer in the layers panel, then click the "Add layer mask" button at the bottom of the layers panel (the box with a dot inside). There will be a new layer mask created, and your sky will be decorationg your image beautifully. Below are my results.
Step Five: Now to make it more realistic. These next steps are a little bit flexible to each image; play with it to see what looks best. First thing is to add some blur to the sky. Notice the rest of the background below the sky is blurry due to depth of field. Our sky needs to match that. Make sure the sky overlay layer is selected. Then go to "Filter", hover over "Blur", and click "Gaussian Blur". Make sure the "Preview" box is checked so you can see how much the sky is being blurred. Adjust the radius until the blur matches the rest of the background. Below, you can see what happens if I blur the sky too much (30.4 radius). There is a strange glow around the horse. With blur, a little goes a lot way. I settled on 7.4 - it's enough to smooth out the horizon line, but not enough to cause that strange glow.
Step Six: If needed, take a moderately soft, black brush (about 50% hardness) to brush off the sky from details that accidentally became covered. Make sure you have the layer mask on the sky selected when you are doing this, as it is above (indicated by the white box around the thumbnail). I'm going to use mine to clean up the ears a touch and remove a bit from the mountains on the right, where the selection took over the edge of them.
Step Seven: Lastly, adjust the opacity of the sky overlay layer by using the opacity bar in the layers panel. Lower the opacity until the colors match well with the rest of the scenery and it looks natural. I settled on 82%, as you can see below.
Step Eight: Merge the layers before continuing with your editing as normal. That way, it will be treated like the edited sky is part of the original image. The last image below is my finished product.


